 Save
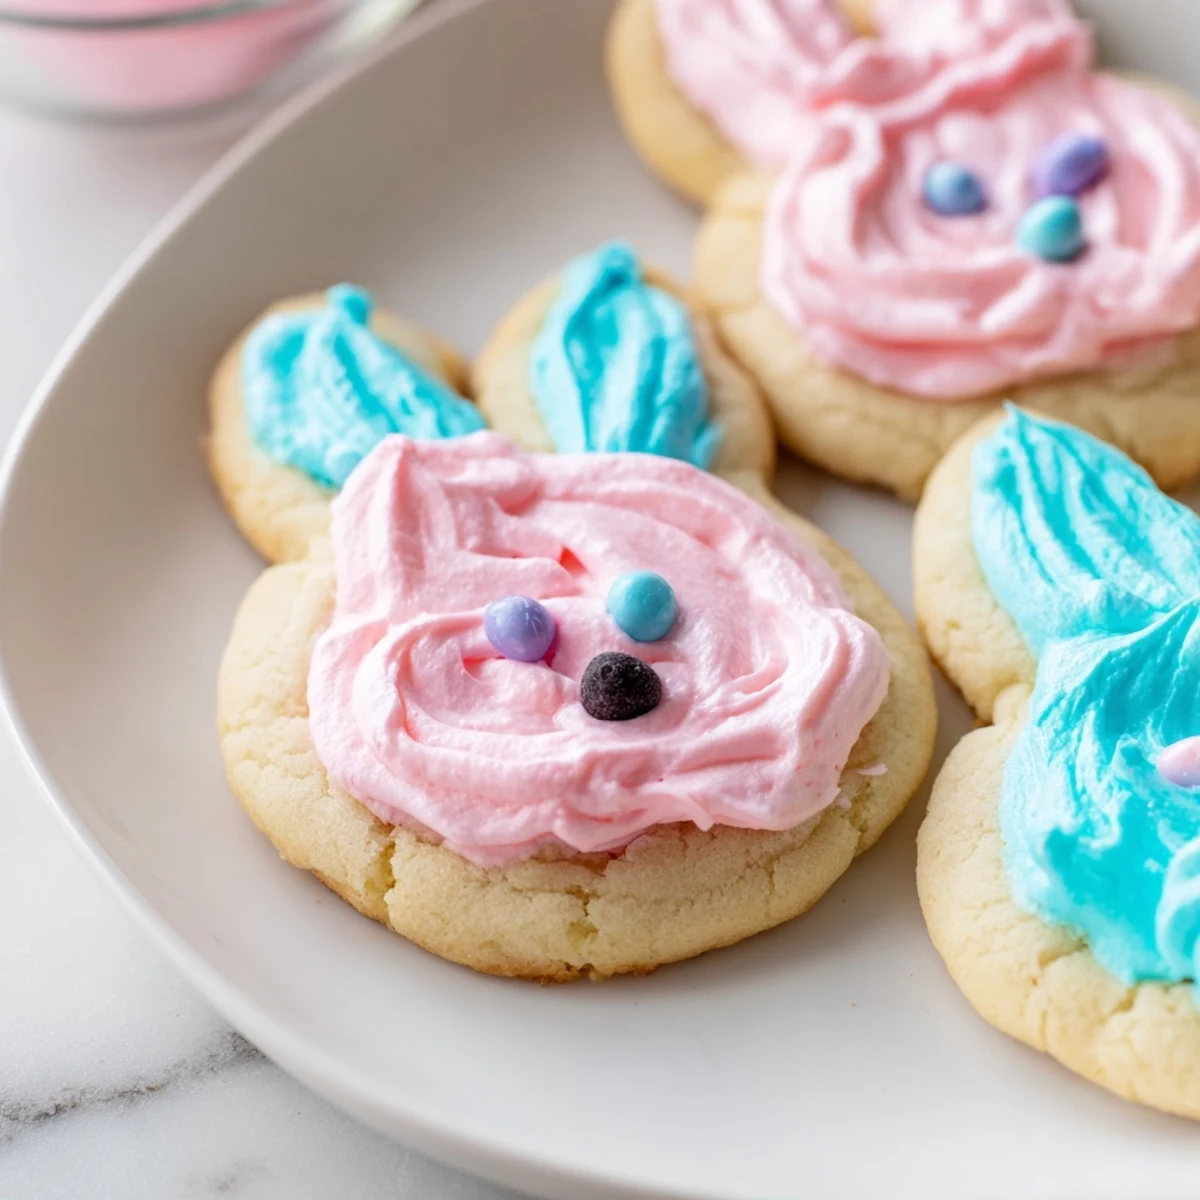
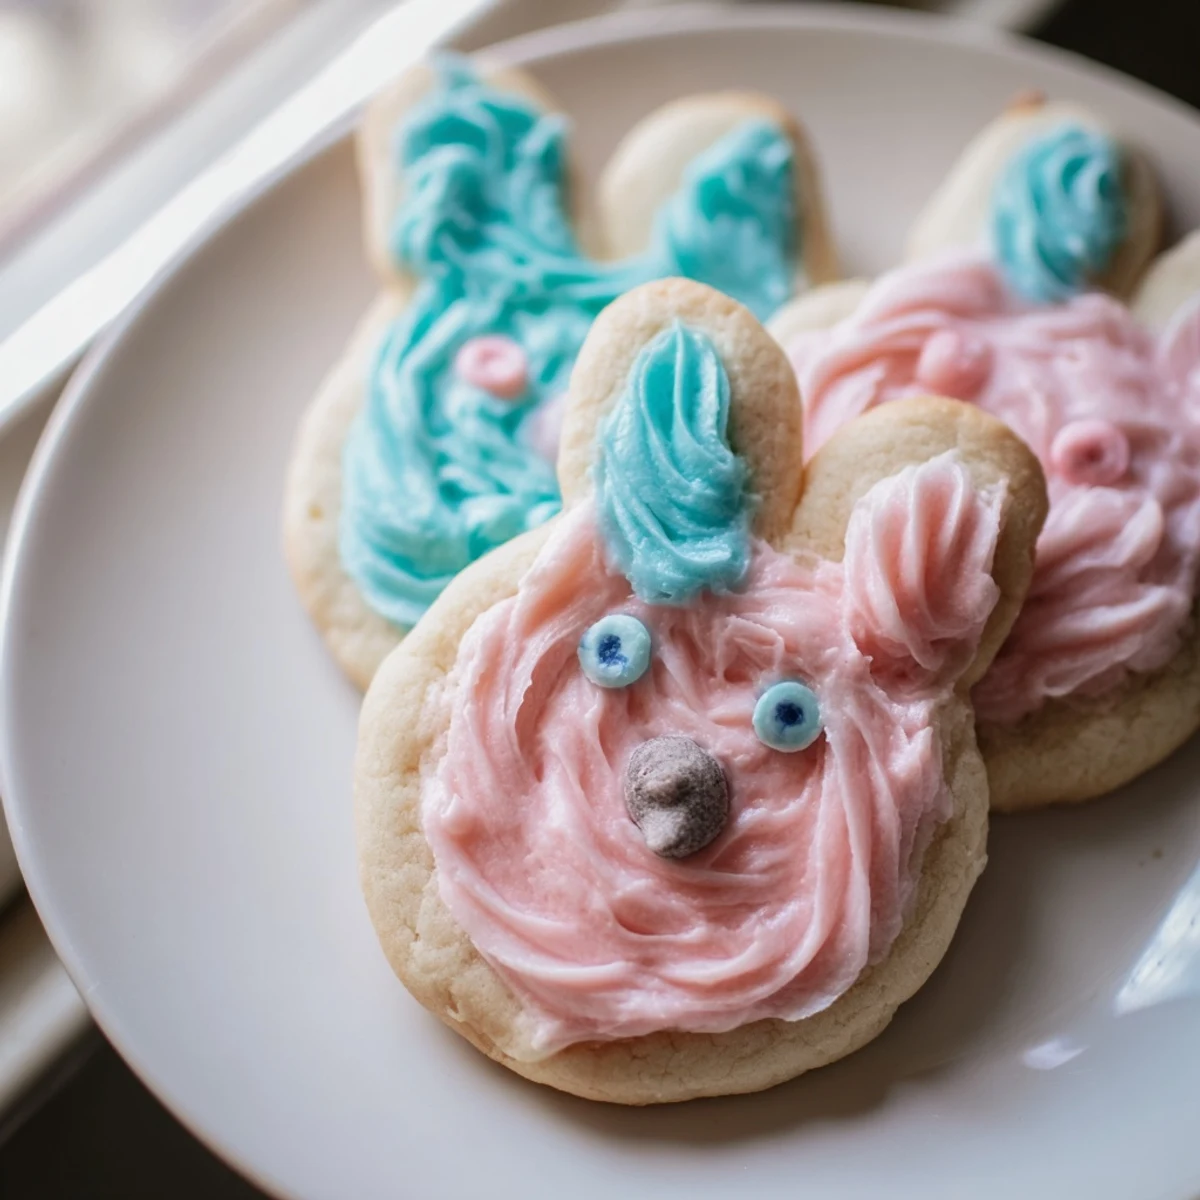
Save These delightful bunny-shaped sugar cookies feature a rich, buttery base topped with silky smooth buttercream frosting. Perfect for spring celebrations, Easter gatherings, or anytime you want to add some whimsy to your baking. The dough comes together quickly and chills for easy rolling, while the customizable frosting lets you create charming pastel bunnies that are almost too cute to eat.
My apartment smelled like pure vanilla heaven when I first attempted these bunny cookies. I'd found an adorable cutter at a thrift shop and couldn't resist trying it out immediately. That first batch had some lopsided ears, but my roommate didn't care—we ate them warm anyway.
Last Easter, my niece decided every bunny needed pink ears and different colored eyes. We ended up with a whole rainbow of bunnies on the counter, none of them matching, all of them perfect. Her sticky fingers and concentrated brow made the kitchen feel magical.
Ingredients
- All-purpose flour: Provides structure and keeps the cookies tender
- Baking powder: Gives just enough lift without spreading too much
- Salt: Balances sweetness and enhances vanilla flavor
- Unsalted butter: Use truly softened butter for proper creaming
- Granulated sugar: Creates the classic crisp edge and chewy center
- Egg: Binds everything together and adds richness
- Pure vanilla extract: Dont skimp herequality makes all the difference
- Powdered sugar: Makes buttercream smooth and not gritty
- Whole milk: Thins frosting to perfect spreading consistency
- Food coloring: Gel coloring works best for pastel shades
Instructions
- Prep your space:
- Preheat oven to 350°F and line baking sheets with parchment paper
- Mix dry ingredients:
- Whisk flour, baking powder, and salt in a medium bowl
- Cream butter and sugar:
- Beat butter and sugar until light and fluffy about 3 minutes
- Add wet ingredients:
- Beat in egg and vanilla until fully incorporated
- Combine everything:
- Gradually mix in dry ingredients just until dough forms
- Chill the dough:
- Divide into two discs, wrap, and refrigerate for at least 30 minutes
- Roll and cut:
- Roll dough to 1/4 inch thickness and cut with bunny cutter
- Bake to perfection:
- Bake for 8 to 10 minutes until edges barely turn golden
- Make the buttercream:
- Beat butter until creamy then add powdered sugar, milk, and vanilla
- Decorate your bunnies:
- Frost cooled cookies and add candy eyes or sprinkles for faces
 Save
Save My mom still talks about the year I brought these to Easter brunch. The adults were just as excited about the bunny faces as the kids were. Sometimes the simplest decorations bring the most joy to a table.
Making Dough Ahead
I've learned that making the dough the night before actually improves the cookies. The flour fully hydrates and the flavors deepen. Plus, you can roll out cold dough more easily without it sticking to everything.
Frosting Like a Pro
Room temperature cookies are essential for frostingotherwise the buttercream melts right off. I learned this the hard way after an impatient decorating session left me with puddly pink bunnies. Now I set a timer and wait it out.
Storage Solutions
These cookies actually taste better on day two when the flavors have melded. Keep them in an airtight container with parchment between layers.
- Freeze unfrosted cookies for up to three months
- Bring frosting to room temperature before using
- Add sprinkles immediately before frosting sets
 Save
Save There's something deeply satisfying about pulling a tray of bunny faces from the oven. Hope your kitchen fills with as much joy as mine does.
Recipe FAQs
- → Can I make the cookie dough ahead of time?
-
Yes, the dough can be prepared up to a day in advance and stored wrapped in the refrigerator overnight. This actually improves the flavor and makes the dough easier to roll out.
- → What's the best way to achieve smooth buttercream frosting?
-
Beat the softened butter until completely creamy before gradually adding powdered sugar. Using room temperature ingredients and mixing thoroughly will give you that silky, spreadable consistency perfect for decorating.
- → How long do these decorated cookies stay fresh?
-
Store in an airtight container at room temperature for up to 3 days. For longer storage, refrigerate for up to a week. Bring to room temperature before serving for the best texture and flavor.
- → Can I freeze the baked cookies?
-
Yes, freeze undecorated baked cookies in a freezer-safe container for up to 3 months. Thaw completely before frosting. It's best to add buttercream decoration after thawing.
- → What alternatives work for the bunny-shaped cutter?
-
If you don't have a bunny cutter, use round cutters and pipe ears with frosting, or try any seasonal shape. The buttery vanilla dough works beautifully with any cutter you have on hand.