 Save
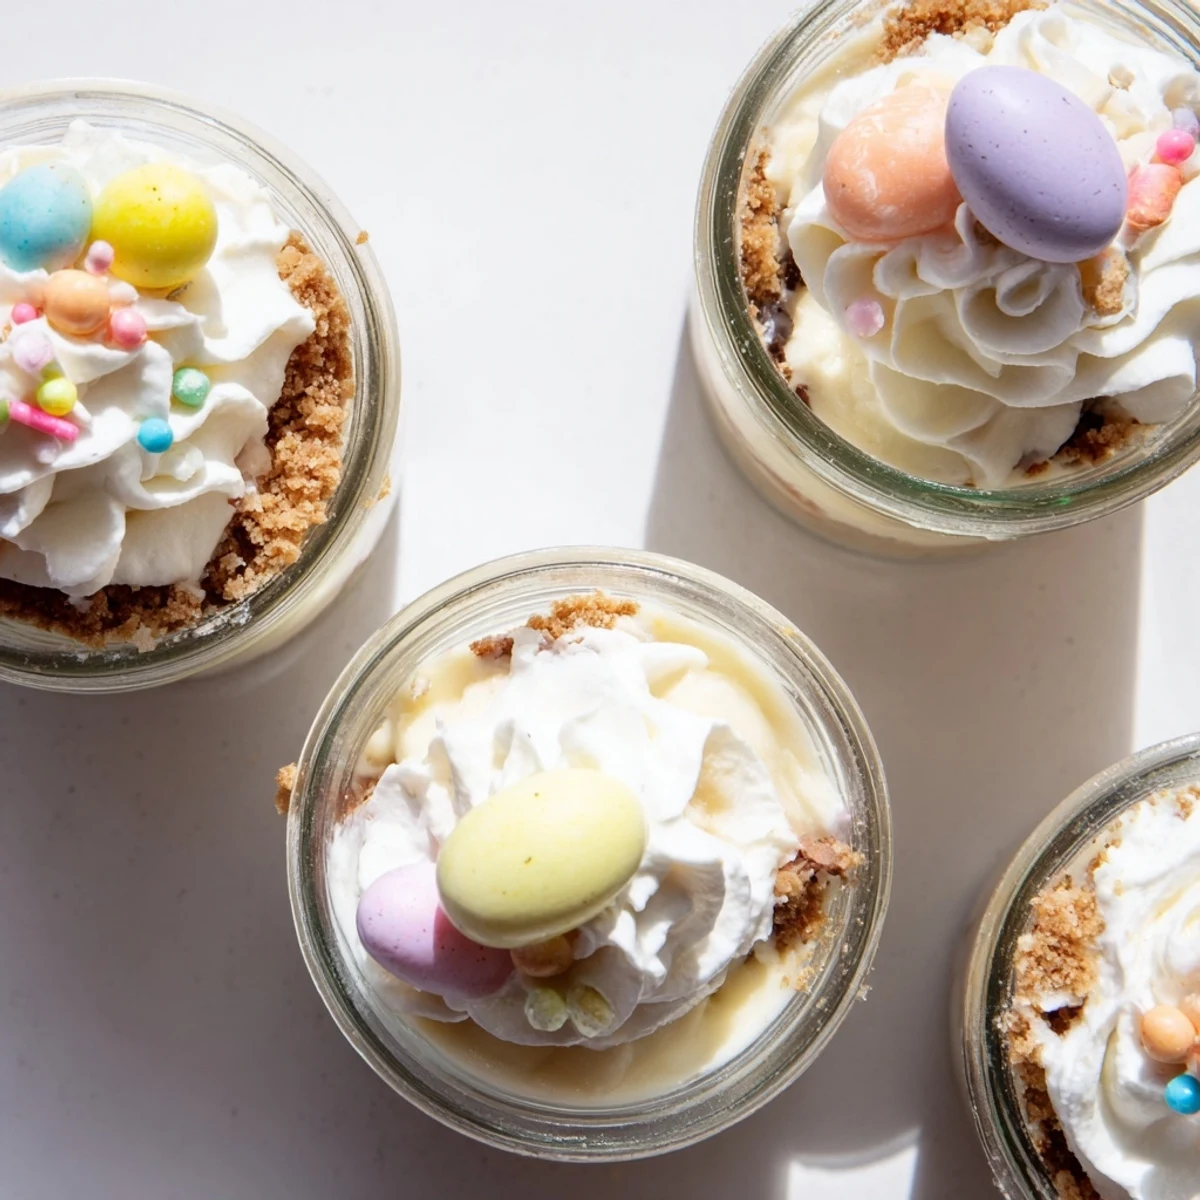
Save These individual cheesecake jars combine a buttery cookie crust with smooth, creamy filling and hidden chocolate Easter eggs tucked inside. The no-bake method makes them perfect for busy holiday entertaining, while the jar presentation adds a charming touch to your dessert table.
Each layer brings something special - the crunch of digestive biscuits or graham crackers, the velvety smooth cheesecake made with cream cheese and whipped cream, and the delightful surprise of miniature chocolate eggs hidden within. Top them with swirls of whipped cream and colorful sprinkles for a show-stopping finish that guests will love.
Make them up to 24 hours ahead and keep chilled until serving, making them an ideal make-ahead dessert for your Easter celebration.
Last spring, my kitchen counter became a laboratory of pastel colored experiments. I wanted something that felt like Easter but was actually portion controlled enough that my family wouldn't complain about being too stuffed for dinner. These little jars solved everything.
I made a dozen of these for our neighborhood egg hunt and honestly, the kids were more excited about the jars than the actual hunt. Watching them discover the hidden eggs was better than any magic trick I could have pulled off.
Ingredients
- 1 cup digestive biscuits or graham crackers, crushed: The buttery foundation that keeps everything grounded and adds that perfect crumbly texture
- 3 tbsp unsalted butter, melted: Use real butter here because margarine just does not give you that same satisfying crunch
- 8 oz cream cheese, softened: Leave it out for at least an hour so you do not end up with tiny stubborn lumps
- 1/3 cup granulated sugar: Just enough sweetness without making it feel like you are eating straight frosting
- 1 tsp vanilla extract: Do not skip this because it is what transforms cream cheese into actual cheesecake
- 1 cup heavy cream, cold: The colder the better for achieving those cloudlike peaks
- 18 mini chocolate Easter eggs: Solid ones work best but honestly whatever colorful chocolate you have will do the trick
- 1/2 cup whipped cream, for topping: Because every great dessert deserves a crown
- 2 tbsp rainbow sprinkles or pastel sugar pearls: The fun factor that makes these instantly festive
Instructions
- Build the Butter Base:
- Mix crushed biscuits with melted butter until every crumb is coated, then press 2 tablespoons into the bottom of each jar. The crust should feel firm and compact like a tiny foundation.
- Whip Up Magic:
- Beat cream cheese, sugar, and vanilla until smooth, then whip cold heavy cream until stiff peaks form. Fold the whipped cream into the cheese mixture gently.
- Layer and Hide:
- Spoon cheesecake filling over the crust, fill jars halfway, then nestle 2 or 3 mini eggs into each layer. Cover with more cheesecake and smooth the tops.
- The Waiting Game:
- Chill for at least 2 hours because the texture transforms from fluffy to perfect. Top with whipped cream, extra eggs, and sprinkles right before serving.
 Save
Save My sister in law asked for the recipe before she even finished her first jar, and honestly that is the highest compliment I have received in years.
Make Ahead Magic
These jars are basically the meal prep MVP of desserts. You can assemble everything up to 24 hours in advance and just keep them chilling in the fridge until ready to serve. The crust actually gets better after sitting overnight.
Play With Flavors
Chocolate cookies instead of graham crackers will completely change the vibe if you want something darker and richer. I have also swapped the eggs for chopped peanut butter cups when Easter was long gone but the craving remained.
The Art of Assembly
Clear jars are non negotiable here because the whole point is seeing those gorgeous layers through the glass. Mason jars work perfectly but any 6 to 8 ounce glass vessel will do the job beautifully.
- Wipe the inside of each jar with a paper towel after filling so the layers look pristine
- Use a piping bag for the whipped cream topping if you want that professional swirl
- Keep an extra handful of crushed cookies nearby for any last minute patches
 Save
Save These jars have become my go to whenever I need to bring dessert somewhere because they travel so beautifully and never fail to make people smile.
Recipe FAQs
- → Can I make these cheesecake jars ahead of time?
-
Yes, these jars can be prepared up to 24 hours in advance and kept refrigerated. Add the whipped cream topping and sprinkles just before serving for the freshest presentation.
- → What size jars work best for this dessert?
-
Small glass jars holding 6-8 ounces each are ideal. This size allows for perfect layering of the crust, cheesecake filling, hidden eggs, and toppings without overcrowding.
- → Can I use different types of cookies for the crust?
-
Absolutely. While digestive biscuits or graham crackers create a classic buttery base, chocolate cookies, vanilla wafers, or even shortbread cookies work beautifully for different flavor variations.
- → What other candies can I use instead of mini Easter eggs?
-
You can substitute the mini chocolate eggs with any festive candy - chocolate bunnies, peanut butter cups, malted milk eggs, or even fresh berries for a lighter option during spring celebrations.
- → How long do these need to chill before serving?
-
The jars need at least 2 hours in the refrigerator to set properly. For the best texture and flavor, aim for 2-4 hours, though they can chill overnight for even easier serving the next day.
- → Can I freeze these cheesecake jars?
-
These jars are best enjoyed fresh from the refrigerator. Freezing may affect the smooth texture of the cheesecake and cause the cookie crust to become soggy upon thawing.