 Save
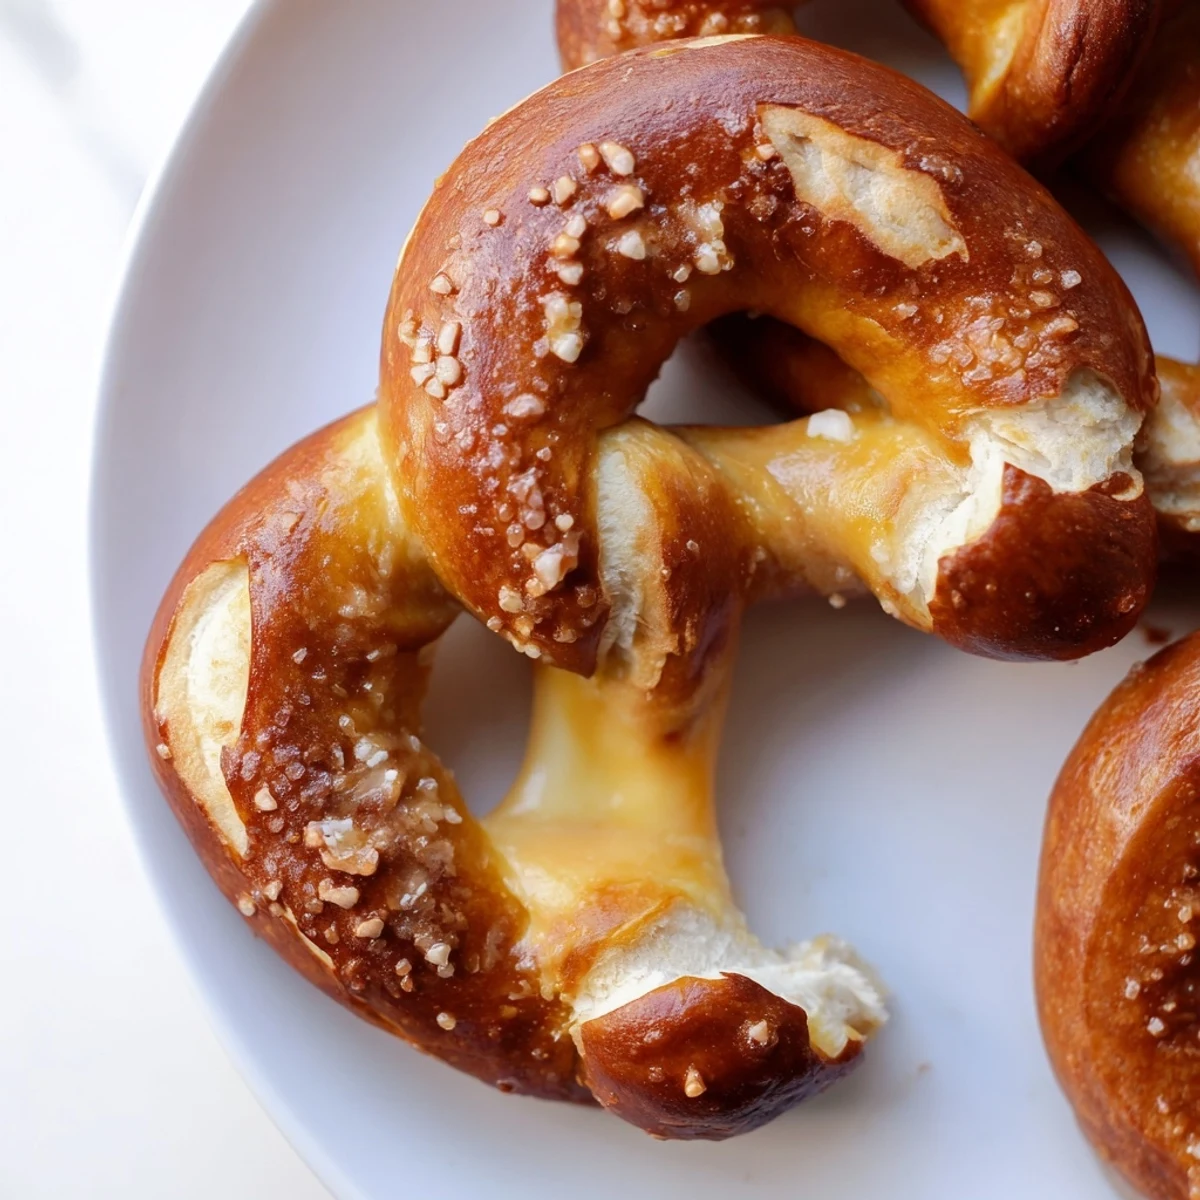
Save These chewy, golden brown soft pretzels feature a rich, gooey mozzarella cheese center that melts beautifully during baking. The classic pretzel dough gets its signature deep brown color and chewy texture from a traditional baking soda bath, while the string cheese filling creates an irresistible pull-apart experience. Ready in about 90 minutes with simple ingredients you likely have in your pantry, these make impressive appetizers for gatherings or satisfying snacks anytime.
The first time I made these, my kitchen filled with that unmistakable warm pretzel smell—the kind that hits you when you walk past a street vendor cart downtown. My roommate wandered in, following her nose, and watched me wrap dough around cheese sticks like I was conducting some sort of edible science experiment. When they came out of the oven, golden and glistening, we burned our fingers tearing into them right there on the counter.
Last winter, I brought a batch to a friends game night, and honestly, they upstaged the actual games. People kept drifting into the kitchen, pretending to get drinks, but really they were hovering around the cooling rack. One friend confessed shed been dreaming about them since I first posted a photo months earlier.
Ingredients
- All-purpose flour: The backbone of that classic chewy pretzel texture bread flour works too but AP flour gives you that perfect balance
- Active dry yeast: Make sure your water is bath warm not hot or youll kill the yeast before it can work its magic
- Warm water: Think baby bath temperature around 110F if you have a thermometer or just comfortably warm to touch
- Granulated sugar: Feeds the yeast and helps the dough develop that gorgeous deep brown color in the oven
- Fine sea salt: Balances the sweetness and enhances that authentic pretzel flavor coarse salt here would make the dough gritty
- Unsalted butter melted: Adds richness to the dough and creates a tender crumb
- Mozzarella cheese sticks: String cheese works perfectly here but cutting blocks into sticks gives you more control over thickness
- Baking soda: The secret ingredient that creates that signature pretzel crust and deep mahogany color
- Large egg beaten: The egg wash gives pretzels their shiny professional looking finish
- Coarse salt: This is where you want those big crunchy flakes that pretzel lovers dream about
Instructions
- Wake up the yeast:
- Dissolve sugar in warm water then sprinkle yeast on top and walk away for 5 minutes You want to see a layer of foam on top that means your yeast is alive and ready to work
- Build the dough:
- Stir in melted butter and salt then gradually add flour mixing until shaggy Knead on a floured surface for 5 to 7 minutes until the dough feels smooth and bounces back when you poke it
- Let it rise:
- Place dough in a greased bowl cover it up and find the warmest spot in your kitchen Wait about an hour until its doubled in size
- Prepare your station:
- Preheat oven to 450F and line two baking sheets with parchment paper Get your cheese sticks ready and clear some counter space for shaping
- Wrap the cheese:
- Divide dough into 8 equal pieces Roll each into an 18 inch rope Flatten it slightly place a cheese stick in the center and pinch the edges tight really tight or cheese will escape during baking Shape into pretzel form
- Make the bath:
- Bring 8 cups water and baking soda to a boil in a large saucepan then reduce to a gentle simmer This step is non negotiable for real pretzel flavor
- Dip and shine:
- Carefully lower each pretzel into the baking soda bath for 30 seconds Remove with a slotted spatula brush with egg and sprinkle with coarse salt immediately
- Bake to perfection:
- Bake for 12 to 15 minutes until theyre deep golden brown not just golden Think the color of a freshly polished copper penny
- Finish with flair:
- Brush hot pretzels with melted butter right out of the oven for extra flavor and that restaurant quality sheen
 Save
Save My dad called me after trying these for the first time at my place, and in his typical understated way, simply said I dont know what you put in these, but dont ever change the recipe. Now he requests them every time he visits, and Ive caught my mom sneakily checking my Instagram for pretzel updates.
The Secret To Perfect Sealing
After my first failed attempt with cheese everywhere, I learned to dampen the dough edges slightly with water before pinching them together. The moisture acts like glue creating a bond that holds up through boiling and baking. I also make sure my cheese sticks are completely dry before wrapping pat them with a paper towel if they feel slick.
Temperature Timing
Ive found that letting the dough rise in the oven with just the light on creates the most consistent environment, especially on cold days. The gentle heat from the bulb speeds things up without overheating the yeast. Just remember to take the dough out before preheating for baking.
Freezing And Make Ahead
These freeze beautifully after baking I wrap them individually and reheat at 350F for about 5 minutes. You can also freeze the shaped pretzels before the baking soda bath, then thaw, boil, and bake fresh. The texture difference is barely noticeable.
- Make a double batch and freeze half for emergency snack attacks
- Wrap baked pretzels tightly to prevent freezer burn
- Reheat directly from frozen no need to thaw first
 Save
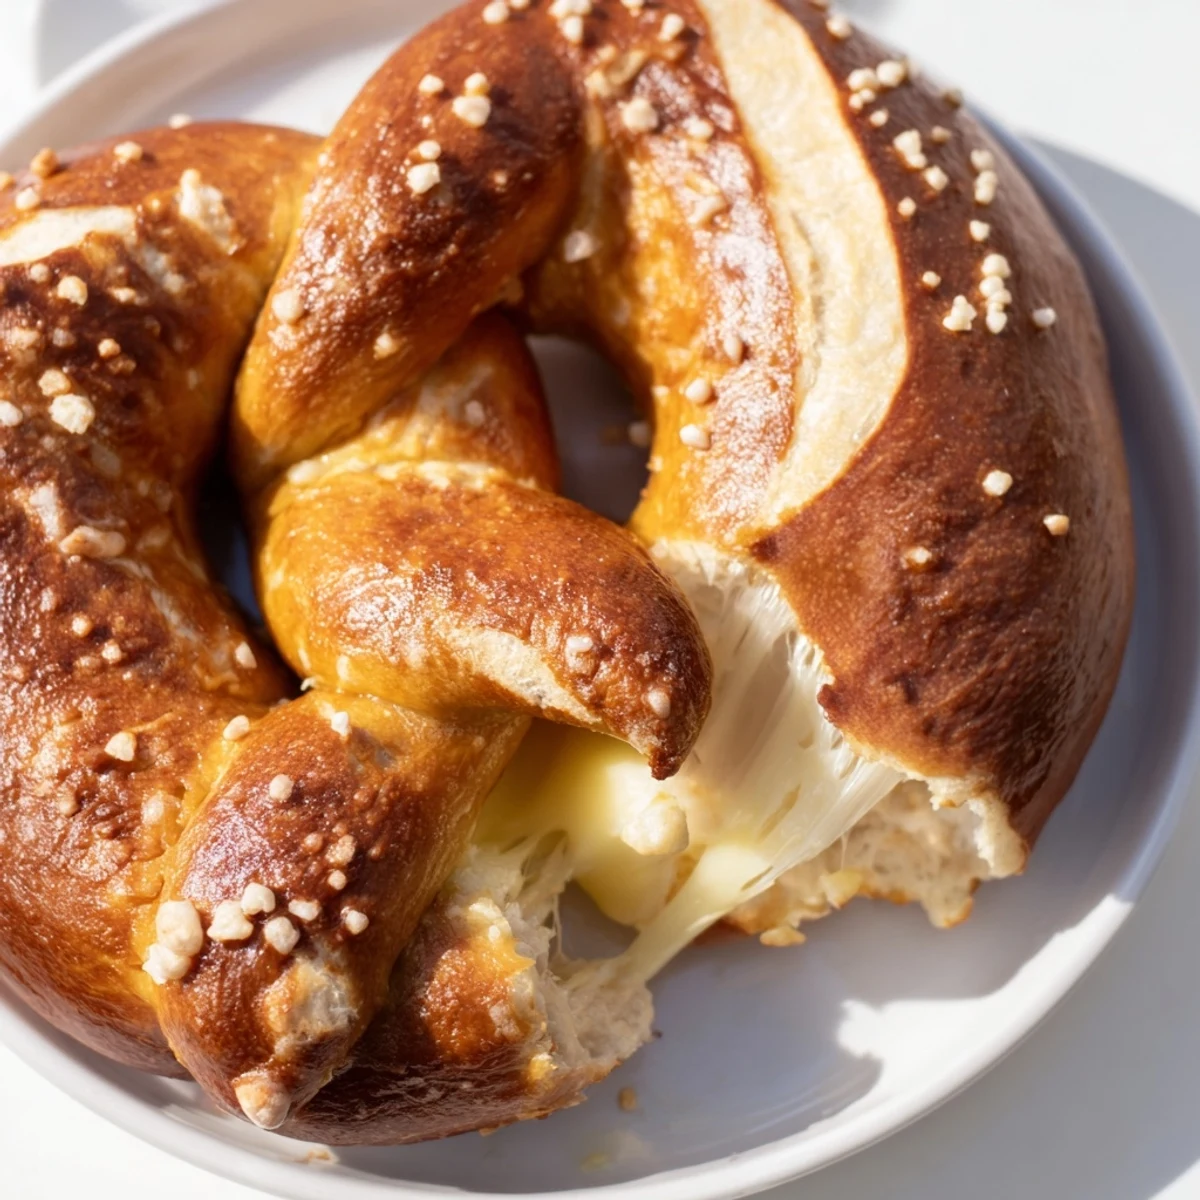
Save Theres something almost magical about breaking through that chewy pretzel exterior and hitting that molten cheese center like a hidden treasure. These have become my go to for everything from Sunday snacking to impressing dinner guests, and I hope they find a permanent place in your kitchen rotation too.
Recipe FAQs
- → What makes pretzels get that dark brown color?
-
The baking soda bath is the secret. Boiling the dough in water mixed with baking soda creates an alkaline environment that promotes the Maillard reaction during baking, giving pretzels their signature deep golden brown color and chewy texture.
- → Can I use different cheese besides mozzarella?
-
Absolutely. Cheddar, pepper jack, or provolone work wonderfully. Just make sure to cut the cheese into sticks that will melt well but hold their shape during baking so you get that satisfying cheese pull when you bite into them.
- → Why do I need to let the dough rise for an hour?
-
The rise time allows yeast to ferment and create carbon dioxide bubbles, making the dough light and airy. This step ensures your pretzels will have that classic soft, chewy interior rather than being dense or bread-like.
- → How do I prevent cheese from leaking out during baking?
-
Pinch the dough edges tightly around the cheese stick and double-check that no cheese is visible before poaching. The baking soda bath also helps create a skin on the dough that seals everything inside while baking.
- → Can I make these ahead of time?
-
You can prepare the dough through the rising step and refrigerate overnight. Let it come to room temperature before shaping. Alternatively, bake completely and reheat in a 350°F oven for 5-7 minutes to restore warmth and crispiness.
- → What's the best way to store leftover pretzels?
-
Store in an airtight container at room temperature for up to 2 days. For longer storage, freeze individually wrapped pretzels for up to 3 months. Reheat in the oven at 350°F for about 8 minutes to refresh the texture.