 Save
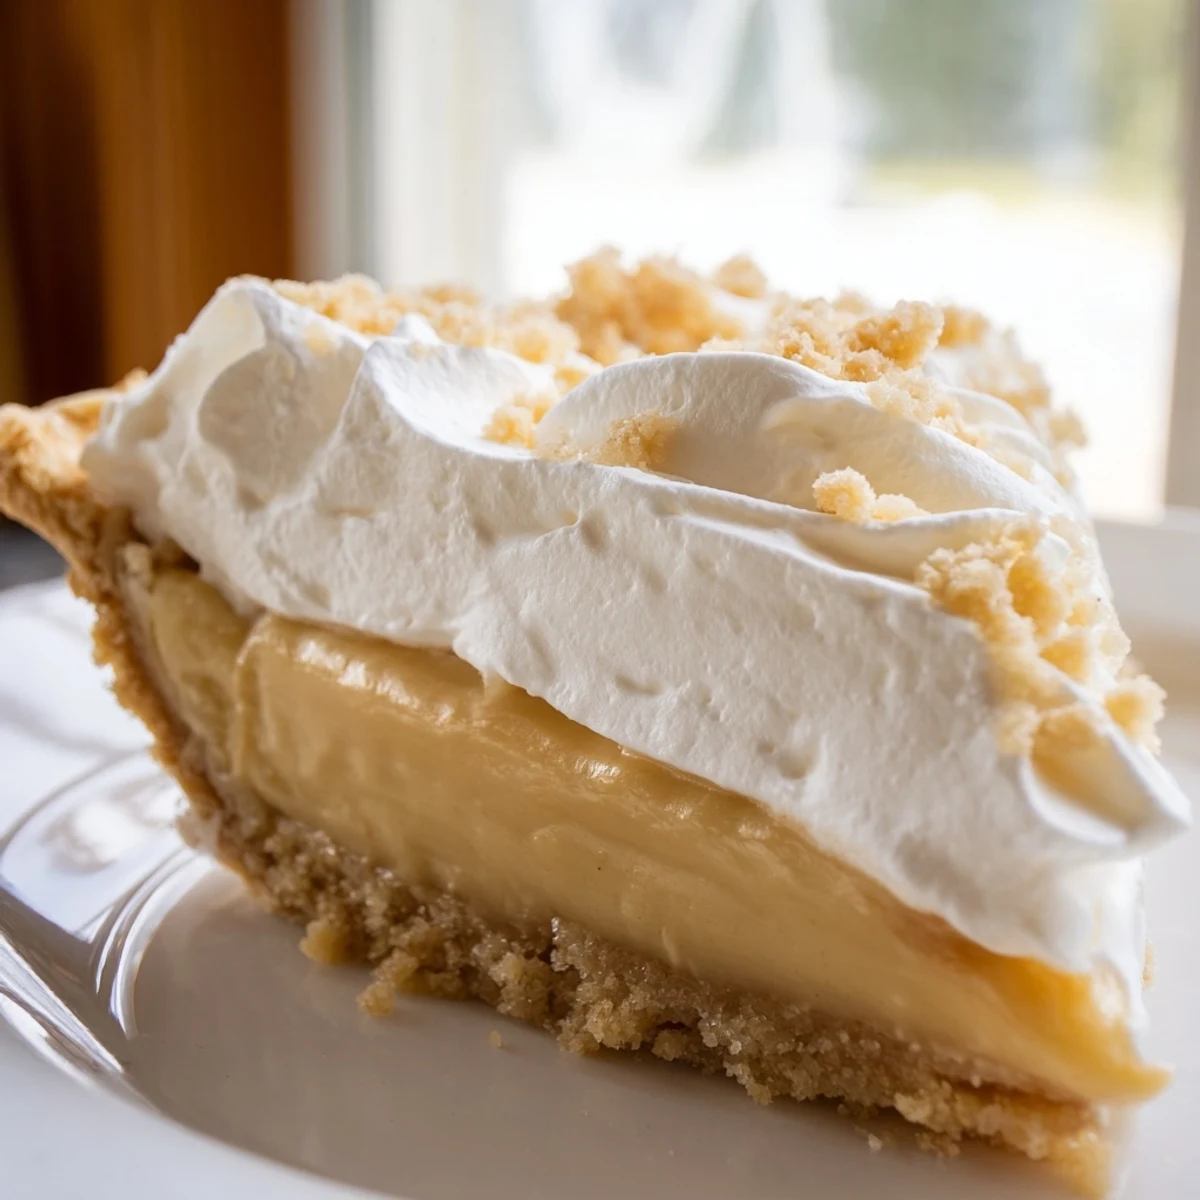
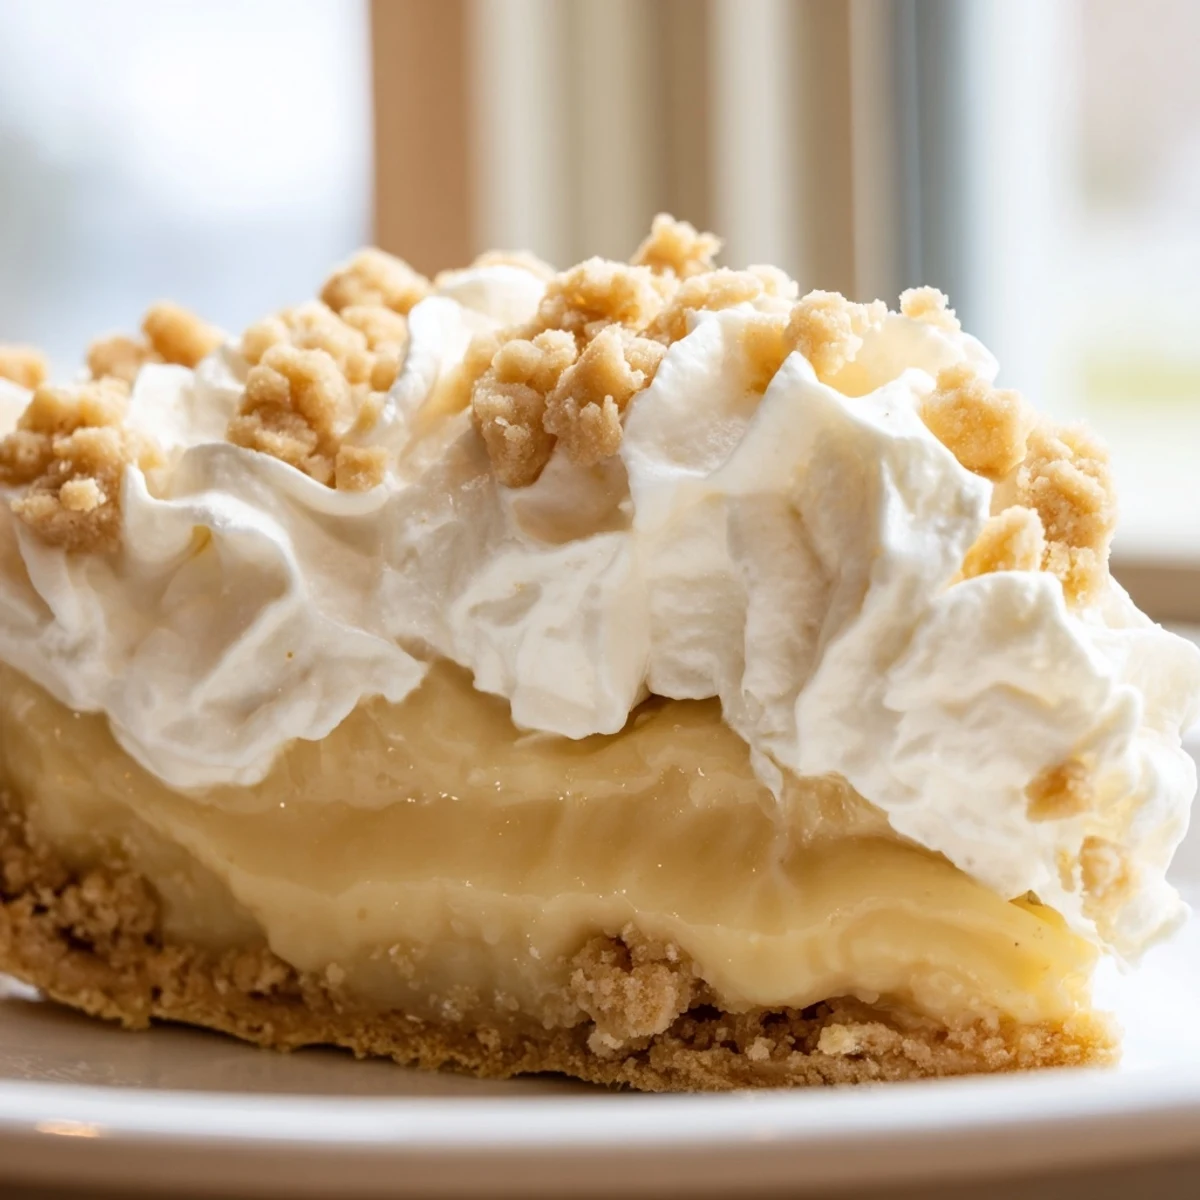
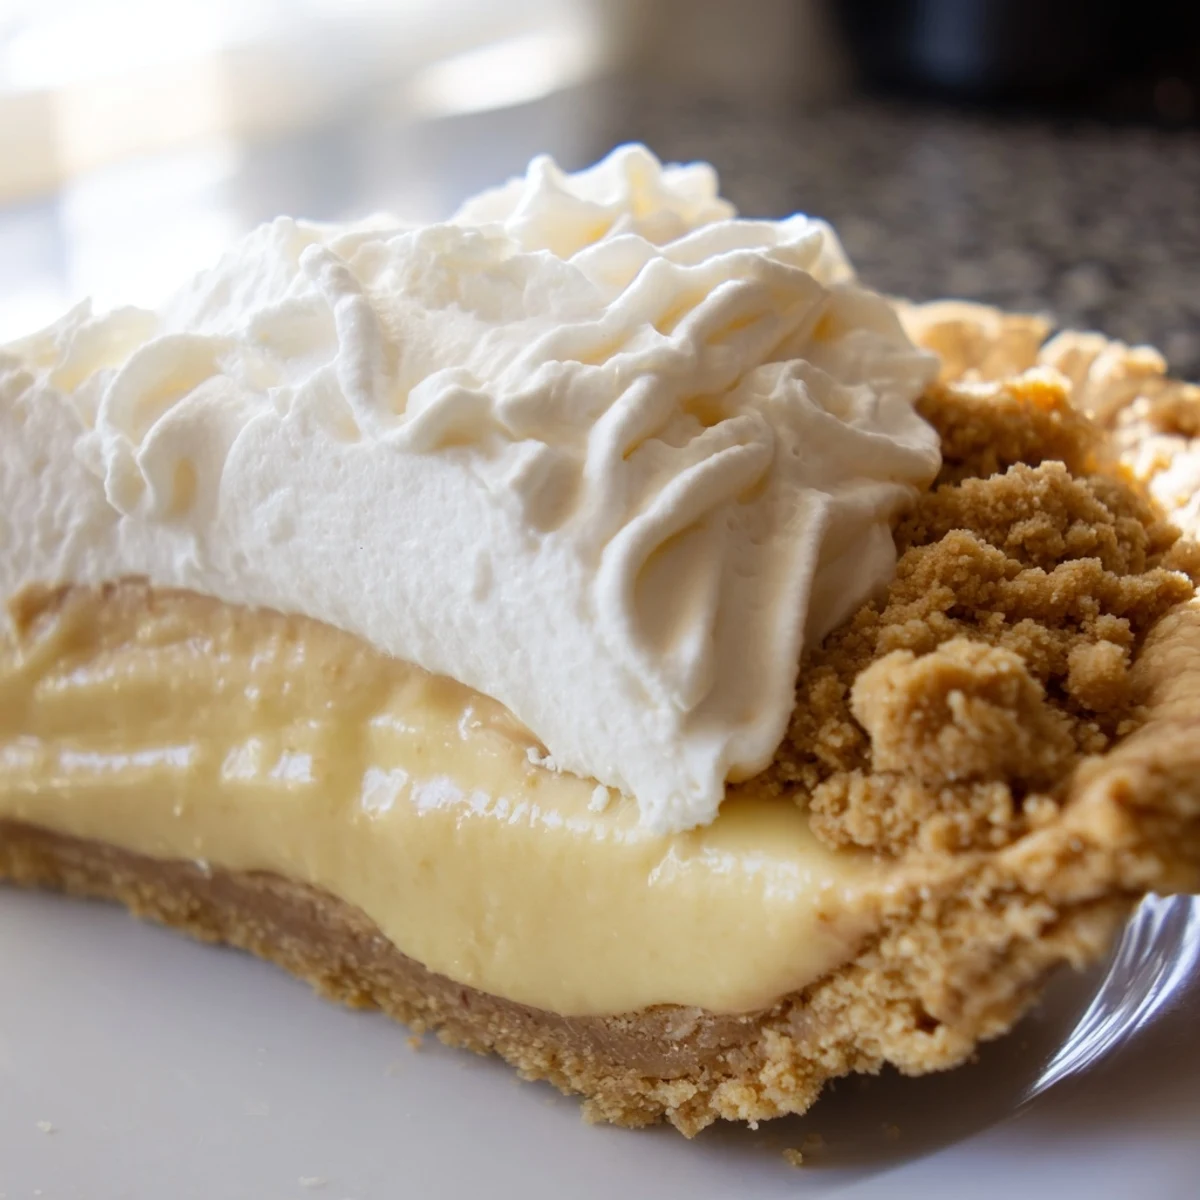
Save This Old Fashioned Amish Peanut Butter Dream Pie delivers pure comfort with every creamy bite. The dessert layers start with buttery peanut butter crumbs scattered across a crisp pie shell, followed by a silky homemade custard filling infused with vanilla and whole milk. After chilling until perfectly set, the pie gets crowned with clouds of freshly whipped cream and a final dusting of sweet peanut butter crumbles.
The magic lies in the contrast of textures—crisp crust, tender crumbs, velvety custard, and airy cream create an indulgent experience. Perfect for gatherings, holidays, or whenever comfort food calls, this Amish classic comes together easily and tastes even better the next day.
The Sunday I first made this pie, my kitchen smelled like warm sugar and butter while my toddler kept sneaking peanut butter crumbles when my back was turned. I'd stumbled across an old Amish bakery recipe tucked inside a antique cookbook, something about the way peanut butter figured so prominently in their farm cooking. That afternoon became legendary in our house—there's something magical about how the creamy filling melts into those sandy peanut butter crumbs.
My neighbor claimed she could taste the difference between store-bought and homemade crust, so I started baking my own just to prove her wrong. We had this little competition going, and this pie became my secret weapon. The way the whipped cream holds those final crumbs on top makes people think you've been practicing pastry techniques for years.
Ingredients
- 1 9-inch prepared pie crust: Having this ready baked and cooled saves so much time, though homemade shortbread adds something special
- 3/4 cup creamy peanut butter: The natural oils help create that perfect sandy texture when mixed with powdered sugar
- 1 cup powdered sugar: This transforms the peanut butter into those incredible crumbles that layer throughout the pie
- 2/3 cup granulated sugar: Sweetens the custard filling without interfering with the peanut butter flavor
- 1/3 cup all-purpose flour: The essential thickener that makes this filling a proper pudding instead of soup
- 1/4 teaspoon salt: A tiny pinch that makes all the other flavors pop and taste more like themselves
- 2 cups whole milk: The richness here makes the filling velvety—skip the skim milk for this one
- 3 large egg yolks: These create that luxurious, glossy texture that sets up so beautifully
- 1 teaspoon pure vanilla extract: Don't use imitation here—real vanilla bridges the gap between sweet and creamy
- 2 tablespoons unsalted butter: Adds that final silky finish to the filling
- 1 cup heavy whipping cream: Cold from the fridge whips up into clouds that balance the rich pudding
- 2 tablespoons powdered sugar: Just enough sweetening for the cream without overpowering everything else
- 1/2 teaspoon vanilla extract: Makes the whipped cream taste like something special
Instructions
- Mix those magic crumbs:
- Grab a fork and work the peanut butter and powdered sugar together until they're crumbly and sandy—it'll seem dry but that's exactly what you want. Press half of this mixture into your cooled crust, then set the rest aside for later.
- Start the creamy base:
- Whisk the granulated sugar, flour, and salt in your saucepan until they're well combined, then slowly stream in the milk while whisking until everything's smooth and lump-free.
- Cook to thick:
- Set the pan over medium heat and whisk almost constantly—that flour needs to fully cook out or you'll taste raw flour later. You're looking for bubbles just breaking the surface and a pudding that coats the back of a spoon.
- Temper those eggs:
- Whisk your yolks in a separate bowl, then gradually stir in about a half cup of that hot milk mixture, whisking furiously so you don't end up with scrambled eggs. Pour this warmed egg mixture back into the saucepan, keep whisking, and cook for another couple minutes until it's glossy and thick.
- Finish with richness:
- Pull it from the heat and stir in the butter and vanilla until everything's perfectly smooth and glossy, then pour this dreamy filling right over those peanut butter crumbs waiting in your crust.
- The patience part:
- Let it cool for about 15 minutes on the counter, then pop it in the fridge for at least 2 hours until it's completely set and no longer jiggly in the center.
- The crown glory:
- Whip that cream with the powdered sugar and vanilla until you have stiff peaks that hold their shape when you lift the beater. Spread this generously over your chilled pie and finish with those reserved peanut butter crumbs scattered over the top.
 Save
Save This was the pie I brought to my first real dinner party as a newlywed, nervous about everything. Watching people close their eyes and make those happy noises when they took the first bite—suddenly I felt like I could actually cook.
The Crust Situation
Store-bought crusts work perfectly fine here, but there's something about a homemade graham cracker crust that makes this pie next-level. The buttery crunch plays so nicely with that creamy filling. If you're feeling ambitious, press crushed graham crackers mixed with melted butter into your pie dish and bake for about 10 minutes before filling.
Make It Your Own
Sometimes I drizzle melted chocolate over the top after spreading the whipped cream—peanut butter and chocolate never disappoints. You could also fold crushed peanut butter cups into the filling for extra texture. Don't be afraid to play around with this one.
Serving Suggestions
A cold slice of this pie with hot coffee is pretty much perfect, especially on a porch swing. It also pairs beautifully with a glass of cold milk, bringing back all those childhood dessert memories.
- Let the pie sit at room temperature for about 10 minutes before serving—it tastes better that way
- Use a hot knife dipped in water for clean slices that show off those beautiful layers
- This pie keeps well in the fridge for a day or two, though it rarely lasts that long
 Save
Save There's something deeply satisfying about a recipe that's been passed down through farm kitchens and Sunday dinners. This pie's been making people happy for generations, and now it's part of your story too.
Recipe FAQs
- → How long does Amish peanut butter dream pie need to chill?
-
Refrigerate for at least 2 hours until the filling is completely set. For best results, chill 3-4 hours or overnight to allow flavors to develop fully and the custard to firm up properly.
- → Can I use a homemade crust instead of store-bought?
-
Absolutely! A homemade graham cracker or shortbread crust adds wonderful flavor and texture. Bake your homemade crust according to recipe directions, cool completely before adding the crumbs and filling.
- → What makes this an Amish-style pie?
-
The old-fashioned approach—making custard from scratch with simple pantry ingredients, the generous layering of peanut butter crumbs, and the emphasis on rich, comforting flavors without modern shortcuts reflects traditional Amish baking techniques.
- → How should I store leftovers?
-
Cover loosely with foil or plastic wrap and refrigerate. The pie keeps well for 3-4 days. Note that the whipped cream topping may soften slightly after the first day, though flavor remains excellent.
- → Can I make this ahead for a gathering?
-
Yes! Prepare the entire pie up to 24 hours in advance. Add the final sprinkle of peanut butter crumbs just before serving for the freshest texture and appearance. The custard actually benefits from extra chilling time.
- → What type of peanut butter works best?
-
Creamy commercial peanut butter creates the smoothest crumb mixture. Natural peanut butter can separate and affect texture. For the filling itself, standard creamy peanut butter ensures consistent results.